White sneakers are a timeless fashion staple. However, their pristine appearance quickly fades. Keeping them looking new requires a combination of proper cleaning techniques and preventative care.
Step 1: Gather Your Cleaning Supplies
Before diving into the cleaning process, ensure you have the necessary tools and products on hand. Avoid harsh chemicals that might damage the material of your sneakers. Here’s what you’ll need:
- A soft-bristled toothbrush or sneaker brush
- Mild dish soap
- Warm water
- A microfiber cloth
- Baking soda (optional, for tough stains)
- White vinegar (optional, for yellowing soles)
- Magic erasers (for stubborn scuffs)
- Shoe protector spray (to prevent future stains)
Step 2: Remove Excess Dirt
The first step in cleaning your white sneakers is to remove any loose dirt, dust, and debris that has accumulated on the surface. This preliminary step is crucial. It prevents you from grinding dirt further into the fabric during deeper cleaning.
Start by using a soft-bristled brush (such as an old toothbrush or a dedicated sneaker brush) to gently sweep away loose dirt.
Focus on areas prone to collecting grim. Check the soles, crevices between the sole and upper, and around the laces. Be thorough but gentle. Too much pressure can damage delicate materials.
For fabric sneakers, lightly tap them together over a trash can to dislodge trapped particles. You can also shake them gently to release any embedded dirt.
If there’s mud caked onto the shoes, allow it to dry completely before brushing it off. Wet mud is harder to manage and more likely to stain.
If your sneakers are machine-washable, take this opportunity to prepare them for washing. Check the care label inside the shoe tongue or along the heel to confirm whether they can withstand a cycle in the washing machine. If so, remove the laces and set them aside.
Also, take out the insoles if possible. These require separate cleaning due to sweat absorption and odor buildup. Soak the laces and insoles in warm, soapy water while you focus on the main body of the shoe.
Step 3: Create a Cleaning Solution
Once you’ve removed surface dirt, it’s time to create a cleaning solution tailored to your sneaker material. A mild detergent mixed with warm water works wonders for most fabrics.
To make the solution:
- Fill a small bowl with one cup of warm water.
- Add about one teaspoon of mild dish soap. Avoid harsh chemicals. This can weaken fibers and lead to yellowing or brittleness over time.
- Stir the mixture until it becomes sudsy but not overly foamy. Too many bubbles can make rinsing difficult.
For tougher stains, mix baking soda with just enough water to form a thick paste. Baking soda is mildly abrasive but safe for most materials.
Step 4: Spot Clean Stains
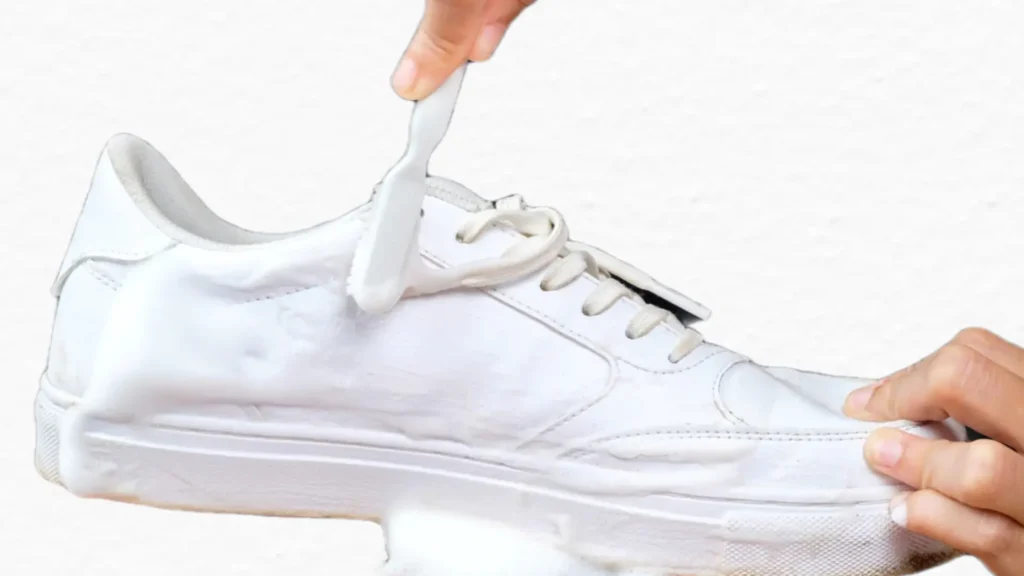
Now comes the detailed work of addressing specific stains. Dip your soft-bristled toothbrush into the soapy water or apply the baking soda paste directly to the affected area. Gently scrub in small circular motions to avoid spreading the stain further.
Concentrate on high-contact zones where dirt naturally accumulates.
For yellowed rubber soles, prepare a mixture of equal parts white vinegar and baking soda. Apply the paste generously to the discolored areas and let it sit for 5–10 minutes.
The combination of acidity from the vinegar and abrasiveness of the baking soda will break down oxidation and grime.
Afterward, use the toothbrush to scrub the soles thoroughly. Wipe away the residue with a damp cloth to prevent buildup.
Be patient during this step. Persistent stains may require multiple applications of the cleaning solution.
Step 5: Tackle Stubborn Scuffs
Scuffs on leather, patent leather, and synthetic materials can be particularly challenging to remove. Enter the magic eraser—a game-changer for restoring the appearance of your sneakers. These melamine foam pads are effective at removing scuff marks without damaging the material.
To use a magic eraser, lightly dampen the pad with water (do not soak it). Rub it gently against the scuffed area using minimal pressure. The eraser’s texture acts like fine sandpaper, buffing away marks without harming the finish. Avoid pressing too hard. Excessive friction can dull the material or create uneven patches.
For suede and nubuck sneakers, skip the magic eraser. Instead, use a specialized suede brush to lift scuffs and restore the nap of the fabric.
Step 6: Rinse and Dry
After spot cleaning, rinse your sneakers carefully to ensure no soap remains. Residue left behind can attract additional dirt and leave unsightly streaks.
Use a clean microfiber cloth to wipe down the entire shoe. Pay close attention to areas where you applied the cleaning solution.
Once rinsed, let your sneakers air dry in a well-ventilated area. Avoid placing them near direct sunlight or heat sources like radiators or hairdryers. Prolonged exposure to heat can cause discoloration or warp the shape of the shoe.
Instead, stuff the interior with paper towels or a clean cloth. This helps absorb moisture and maintains the shoe’s structure as it dries. Replace the stuffing periodically if it becomes saturated.
If you washed removable components like laces and insoles, lay them flat to dry alongside the shoes. Do not put them back into the sneakers until everything is completely dry.
Step 7: Protect Your Sneakers
Cleaning your sneakers is only half the battle. Protecting them ensures they stay looking new for longer. Once your sneakers are fully dry, apply a protective spray designed for their specific material. These sprays create an invisible shield that repels water, oil, and dirt. This reduces the frequency of deep cleans.
Here’s how to apply the protector:
- Shake the spray bottle according to the manufacturer’s instructions.
- Hold it about 6–8 inches away from the shoe and mist evenly across the surface.
- Allow the spray to dry completely before wearing the sneakers again.
Reapply the protective coating every few weeks for frequent usage. Regular reapplication enhances durability and keeps your sneakers looking fresh.
By following these steps, you’ll not only clean your white sneakers effectively but also extend their lifespan and maintain their pristine appearance.
Additional Tips for Longevity
Give your sneakers a break by alternating between multiple pairs. This reduces wear and tear and allows time for thorough drying between uses.
On rainy days, consider wearing waterproof shoe covers to shield your sneakers from mud and moisture. Don’t wait until your sneakers are filthy to clean them. Regular maintenance prevents stains from setting in and keeps them looking fresh.
When not in use, store your sneakers in a cool, dry place. Avoid stacking heavy items on top of them to preserve their shape.
Cleaning white sneakers doesn’t have to be a daunting task. With a little effort and the right techniques, you can restore their original brightness and extend their lifespan. By following these steps and adopting good habits, you’ll ensure your sneakers remain a stylish and reliable part of your wardrobe for years to come.