Cleaning your dog’s ears is an essential part of their grooming routine. It is essential for their health. However, for many pet owners, the process can feel daunting. With the right approach and resources, cleaning your dog’s ears can become a stress-free and rewarding experience for both you and your furry companion.
When a Dog Needs Ear Cleaning
Knowing when to clean your dog’s ears is just as important as knowing how to clean them. Over-cleaning can cause irritation, while under-cleaning can lead to infections. Here are some signs and situations that indicate your dog’s ears need cleaning:
Visible Dirt
Cerumen or ear wax in dog’s ear protects the ear by trapping dirt and debris. However, when wax accumulates excessively, it creates a blockage and trap moisture. Bacteria and yeast thrive in that environment. This results in infections, discomfort, and hearing issues for your dog.
Unpleasant Odor
Malassezia, a common yeast found on the skin and in the ears of dogs. When these microorganisms overgrow, they produce volatile organic compounds (VOCs) as metabolic byproducts, which are responsible for the foul smell. Factors like moisture buildup, allergies, and a weakened immune system create an ideal environment for these organisms to thrive.
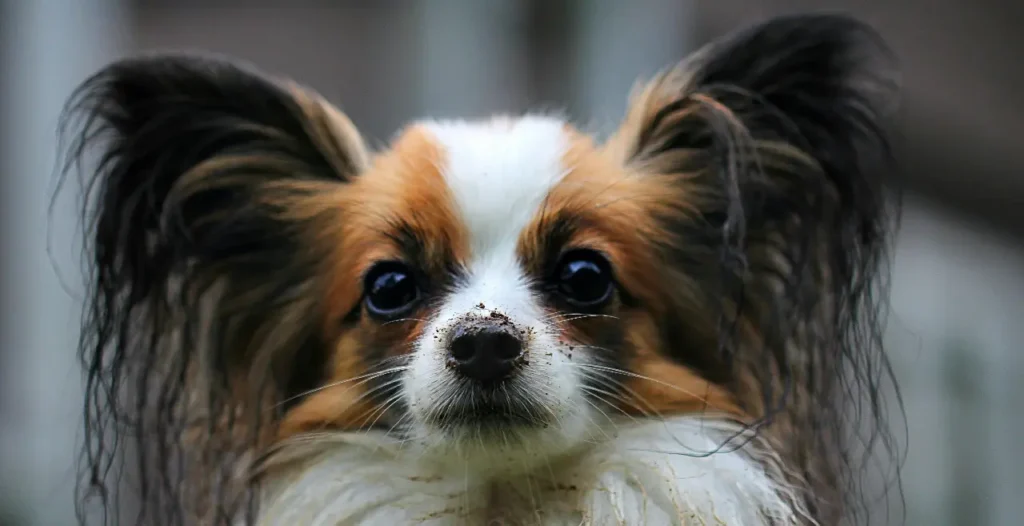
A yeasty smell coming from your dog’s ears is often a clear indicator of an underlying issue. This odor accompanies redness, swelling, discharge, or your dog frequently scratching and shaking their head. Breeds with floppy ears, such as Cocker Spaniels and Basset Hounds, are especially prone to these issues due to reduced airflow in the ear canal.
Excessive Scratching and Head Shaking
Excessive scratching and head shaking are responses to itching and pain caused by various factors. Common culprits include allergies, ear mites, bacterial and yeast infections. Sometimes, it is caused for accumulating of wax and debris. Excessive scratching and head shaking causes blood vessels in the ear flap to rupture.
Redness
Clean your dog’s ear when you notice redness, swelling, and unusual warmth around your dog’s ear canal. Affected ears feel tender to the touch. Your dog may react by pulling away, whining, and scratching excessively. In some cases, the swelling accompanies foul odor, discharge, and scabbing.
Bacterial and fungal infections are common causes for redness in dog’s ear. Allergies also trigger inflammation. Excessive scratching, and insect bites lead to localized swelling and redness.
Discharge
Any unusual discharge is a clear indication that something is wrong. Discharge can be a sign of infection, allergies, and ruptured eardrum. The color and consistency provide clues about the underlying issue:
Yellow/Green: Likely bacterial infection.
Brown: Could indicate yeast infection and ear mites.
Bloody: May suggest trauma or a more serious condition like a tumor.
After Bathing
Water can be trapped after bathing and swimming. This creates a damp environment suitable for bacteria and fungi. Water inside the ear canal disrupts the ear’s natural pH balance and protective barriers. This increases the risk of otitis externa, a common outer ear infection that can cause inflammation, pain, and discharge. If left untreated, the infection spreads deeper into the ear, and causes serious complications like otitis media.
Breed-Specific Needs of Ear Care
Certain dog breeds are naturally more susceptible to ear problems. These dogs require frequent ear cleaning and monitoring to prevent infections and discomfort.
Dogs with long, droopy ears are particularly prone to ear infections. Basset Hounds, Cocker Spaniels, Bloodhounds belong to this category. Their ear flaps cover the ear canal, reduces airflow and traps moisture. This creates the perfect warm, humid environment for bacteria and yeast to thrive.
Some breeds have hair inside their ear canals. This hair traps wax, debris, and moisture. leading to blockages and infections. Pluck hair regularly if your dog belongs to Poodles, Schnauzers, and Shih Tzus.
Golden Retrievers, Bulldogs, French Bulldogs, Labrador Retrievers are prone to allergies. They experience increased ear wax production, chronic inflammation, and frequent infections. Allergic reactions make the ears red, itchy, and swollen.
When You Can Clean Your Dog’s Ears by Yourself
Clean your dog’s ear by yourself only when the ears are healthy and free from signs of infection. Routine cleaning is appropriate. Do it yourself if there’s mild wax buildup, dirt, and debris in the outer ear, and no symptoms of redness, swelling, discharge, and a foul odor.
Regular maintenance cleaning helps prevent infections by removing excess moisture and debris. If you’re familiar with the process and your dog is calm and cooperative during handling, at-home cleaning can be both safe and effective.
However, it’s important to ensure that you’re using the right tools and techniques. Only use vet-recommended ear cleaners specifically formulated for dogs. Avoid inserting anything deep into the ear canal. Cotton swabs can push debris further inside or damage the eardrum. Instead, focus on cleaning the visible parts of the ear with cotton balls or gauze. Use treats and praise to make the experience less stressful for your dog.
When You Should Seek Professional Help for Cleaning Dog’s Ears
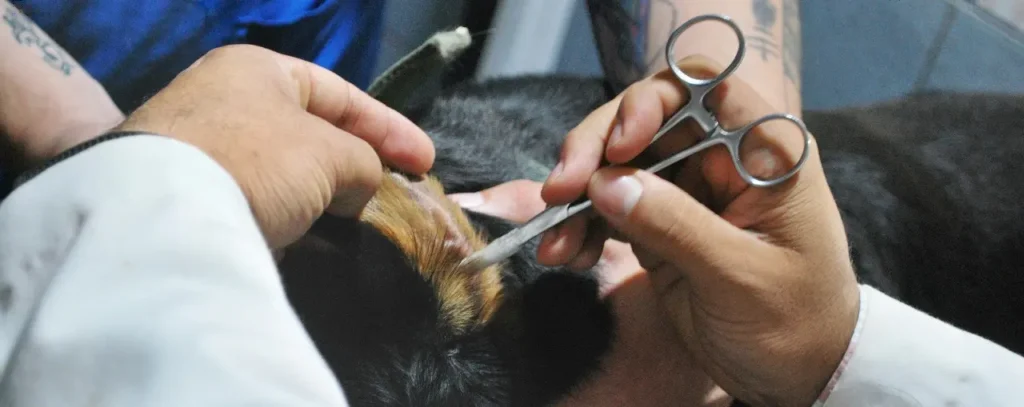
Seek professional help for cleaning dog’s ears if you notice signs of infection, and irritation. Persistent foul odors, excessive discharge, significant redness, swelling, and pain are clear indicators that your dog’s ears require veterinary attention. Meet the vet for bacterial or yeast infections, ear mites, and ruptured eardrum. Attempting to clean infected ears at home without proper treatment can worsen the condition.
Foreign objects harm your dog’s ear. Professional help is necessary if your dog has grass seeds, ticks, or debris lodged in their ears. Trying to remove these objects yourself can damage the ear canal.
A veterinarian may use specialized tools to safely remove hardened wax deep in the ear canal. A vet can provide tailored solutions to address the root cause.
Finally, if your dog becomes aggressive, fearful, or overly anxious during ear cleaning attempts at home, it’s best to leave the task to a professional. Moving suddenly during the process can lead to accidental injury. If you’re unsure about the condition of your dog’s ears or feel uncomfortable, consult a veterinarian. They have the expertise and tools to handle the most challenging cases.
Step-by-Step Guide to Cleaning Your Dog’s Ears
Proper preparation ensures the safety of your dog. It makes the cleaning process smoother and less stressful. Follow this step-by-step guide to cleaning your dog’s ears.
Gather Your Supplies
Gather the right supplies for the cleaning. Start by choosing a vet-recommended ear cleaner solution. These solutions maintain the ear’s pH balance and gently dissolve wax and debris. Avoid using hydrogen peroxide and alcohol-based solutions. They dry out the sensitive tissues of the ear and lead to discomfort and damage. For wiping away dirt and excess cleaner, use soft cotton balls or gauze. Never use cotton swabs (Q-tips).
Having treats on hand is essential to reward your dog for creating a positive association with the ear-cleaning process. Consider using a headlamp to see clearly inside the dog’s ear.
Inspect the Ears Before the Cleaning
Perform a thorough visual inspection of your dog’s ears before starting the cleaning process. Start by checking for signs redness, swelling, unusual discharge or a foul odor. If you notice any of these signs, it’s best to consult your vet before proceeding with cleaning.
Additionally, observe your dog’s behavior—if they seem sensitive or react negatively when you touch their ears, this could be a sign of underlying discomfort or injury that requires professional evaluation.
Apply the Ear Cleaner
To make it comfortable, warm the solution before applying the ear cleaner. To do this, simply hold the bottle of ear cleaner in your hands for a few minutes to bring it closer to body temperature. Warming it helps ensure their comfort.
Once the solution is ready, gently pull your dog’s ear flap straight up or back to open the ear canal. This allows you to access the canal more easily. Carefully squeeze the recommended amount of ear cleaner into the ear canal. Avoid overfilling.
After administering the cleaner, allow it to flow naturally into the ear canal without inserting anything into the ear. The goal is to let the solution break down wax and debris effectively. It’s normal for your dog to react slightly to the sensation of liquid entering their ear.
Massage the Base of the Ear
Gently massage the base of your dog’s ear for about 30 seconds. Use your thumb and fingers to apply light pressure in a circular motion at the base of the ear. As you massage, you should hear a squishing sound. It indicates that the cleaning solution is effectively working its way through the ear canal to break down wax and debris. The gentle massage feels soothing to most dogs. By breaking down these materials, the massage makes it easier to remove them.
Allow Your Dog to Shake
After massaging let the dog shake the head. This natural response helps to bring loosened debris from deep to the outer ear to easily wipe away. When your dog shakes the head, be prepared for flying droplets of ear cleaner and debris. To avoid getting splattered, take a step back while keeping a gentle hold on your dog to ensure they don’t accidentally injure themselves. Once they’ve finished shaking, you can proceed to gently wipe away any remaining debris from the outer ear using cotton balls or gauze.
Use Technology
Modern technology has made it easier than ever to clean dog’s ears with greater precision. Ear cleaning kits with LED provide better visibility into the ear canal. These kits often include small, handheld devices with built-in LED lights to illuminate the dark and narrow spaces of the ear. It helps to spot dirt, wax buildup, redness, and abnormalities.
This added visibility ensures that you can clean your dog’s ears thoroughly without injuring sensitive areas. For dogs with darker fur and narrow ear canals, these tools are helpful in ensuring nothing is overlooked during the cleaning process.
Smartphone-compatible video otoscopesallow you to capture real-time images and videos of your dog’s ear canal. By viewing the footage on the phone screen, you can safely inspect the ear for signs of infection, and foreign objects. This combination of technology and convenience ensure your dog’s ears stay healthy and problem-free.
By incorporating modern tools and techniques into your dog’s ear-cleaning routine, you can ensure the process effective and safe. Regular ear cleaning prevents infections, and reduces the risk of complications. With a little preparation and the right tools, maintaining your dog’s ear health become a seamless part of your pet care routine.